
On this page▼
- Why You Should Set Up Google Search Console
- Prerequisites Before You Begin
- Step-by-Step: How to Set Up Google Search Console
- 1) Open Google Search Console
- 2) Choose Your Property Type
- 3) Verify Site Ownership
- 4) Submit Your Sitemap
- 5) Check Index Coverage
- 6) Wait for Data to Populate
- How to Use GSC Data for Local SEO
- Performance Report
- Pages Report
- Mobile Usability
- Enhancements
- Common Mistakes When Setting Up GSC
- How Rankley Enhances Google Search Console
- FAQ: Google Search Console Setup
- Do I need both Domain and URL Prefix properties?
- How long until data appears?
- What if important pages aren’t indexed?
- Conclusion
Looking for a clear Google Search Console setup guide? This step-by-step tutorial shows you how to set up Google Search Console, verify your site, submit a sitemap, fix indexing issues, and use GSC data to grow traffic—especially for local SEO.
If your site isn’t properly connected to GSC, you’re missing critical insights about how customers find you in search.
Why You Should Set Up Google Search Console
If you want your website to rank—especially in local search—you need visibility into what’s happening behind the scenes.
Google Search Console is a free tool that shows:
- Which queries trigger your site
- Which pages get impressions and clicks
- Whether your pages are indexed correctly
- Technical issues blocking rankings
This Google Search Console setup guide walks you through connecting your site and using GSC for SEO growth—not just checking it once and forgetting about it.
Prerequisites Before You Begin
Before you set up GSC, make sure you have:
- A Google account for your business
- Access to your domain’s DNS or CMS
- A sitemap file (most SEO plugins generate this automatically)
With these ready, you can complete your Google Search Console setup in minutes.
Step-by-Step: How to Set Up Google Search Console
1) Open Google Search Console
Go to
👉 https://search.google.com/search-console
Click Add property. This is where every successful GSC setup begins.
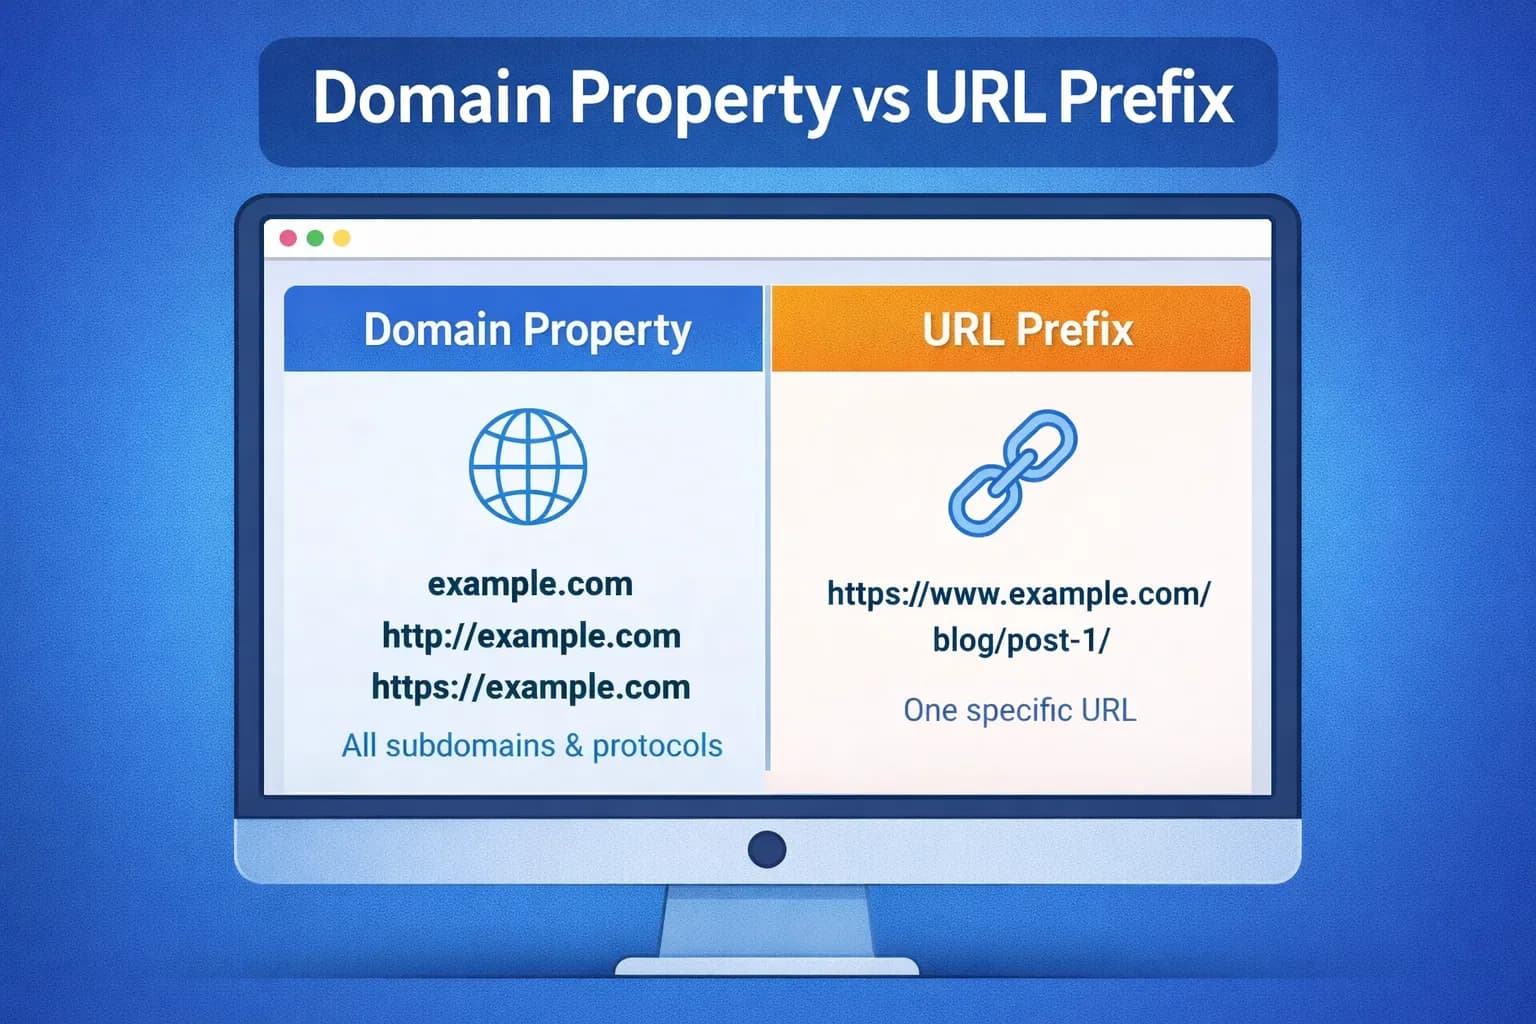
2) Choose Your Property Type
You’ll be asked to choose between two options:
-
Domain property
Tracks all versions of your site (http/https, www/non-www, subdomains).
✅ Best for complete coverage. -
URL prefix
Tracks only one specific version (for examplehttps://www.example.com/).
✅ Easier to verify, but limited.
Recommendation:
Use a Domain property for your primary setup. You can add URL prefixes later if needed.
3) Verify Site Ownership
Google needs to confirm you own the site. You can verify using:
- DNS TXT record (most reliable, recommended)
- HTML file upload
- HTML meta tag
- Google Analytics or Tag Manager
Pro tip: DNS verification is the most future-proof option and rarely breaks.
4) Submit Your Sitemap
In the left menu, open Sitemaps and submit your sitemap URL, such as:
/sitemap_index.xml(common if you use an SEO plugin)/sitemap.xml(common on simpler sites)
Example sitemap paths:
/sitemap_index.xml
/sitemap.xml
Click Submit. This helps Google crawl your site more intelligently.
5) Check Index Coverage
Go to Indexing → Pages and confirm that key pages are indexed:
- Homepage
- Service pages
- Location pages
- Blog posts
If a page isn’t indexed, use Request indexing after fixing any issues.
Unindexed pages cannot rank—this step is critical when you set up GSC for SEO.
6) Wait for Data to Populate
Within 24–48 hours, the Performance report will begin showing:
- Impressions
- Clicks
- Queries
- Pages receiving traffic
Now GSC is officially working.
How to Use GSC Data for Local SEO
Once your Google Search Console setup is complete, these reports are the most valuable for local businesses:
Performance Report
- Identify local queries like “plumber near me” or “roofing company in Denver”
- Compare CTR between service and location pages
Pages Report
- See which pages attract traffic
- Spot pages with impressions but low clicks (optimization opportunities)
Mobile Usability
- Fix mobile issues that hurt conversions and rankings
Enhancements
- Monitor structured data such as
LocalBusinessschema
Many GSC tutorials miss this—but the Performance report alone can guide most local SEO improvements.
Common Mistakes When Setting Up GSC
Avoid these common issues:
- Only verifying a URL prefix and missing other site versions
- Forgetting to submit a sitemap
- Ignoring indexing errors and exclusions
- Setting up GSC once and never reviewing the data again
A proper Google Search Console setup guide always emphasizes ongoing monitoring.
How Rankley Enhances Google Search Console
Google Search Console is powerful—but overwhelming.
Rankley connects directly to GSC and lets you ask questions like:
- “Which keywords drove traffic to my homepage?”
- “What local queries gained impressions last month?”
- “Which location page lost clicks?”
Instead of digging through reports, Rankley turns GSC data into clear, actionable insights for businesses and agencies.
FAQ: Google Search Console Setup
Do I need both Domain and URL Prefix properties?
Use Domain for full coverage. Add URL prefixes only if you need segmented views.
How long until data appears?
Typically 24–48 hours after verification.
What if important pages aren’t indexed?
Fix technical issues, then use Request indexing inside GSC.
Conclusion
Now you know how to set up Google Search Console step by step—verify ownership, submit a sitemap, and use Performance data to improve local SEO.
GSC is not a “set it and forget it” tool. When reviewed regularly, it becomes one of the most valuable assets in your SEO stack.
👉 Try Rankley free to turn Google Search Console data into clear recommendations and faster wins.